
Since the Release of Siltbreaker’s Act 1, there was nothing else to do except try to beat Rhyzik. As you already know, these days a lot of players are trying to kill Rhyzik, the last boss in Dota 2 Siltbreaker’s Act 1. On first look, it’s really hard. But, what if we tell you that it’s not that hard if you have the right pick and items? That’s why we’re making this step by step guide explaining items pickup and strategy as you fight your way to Rhyzik.
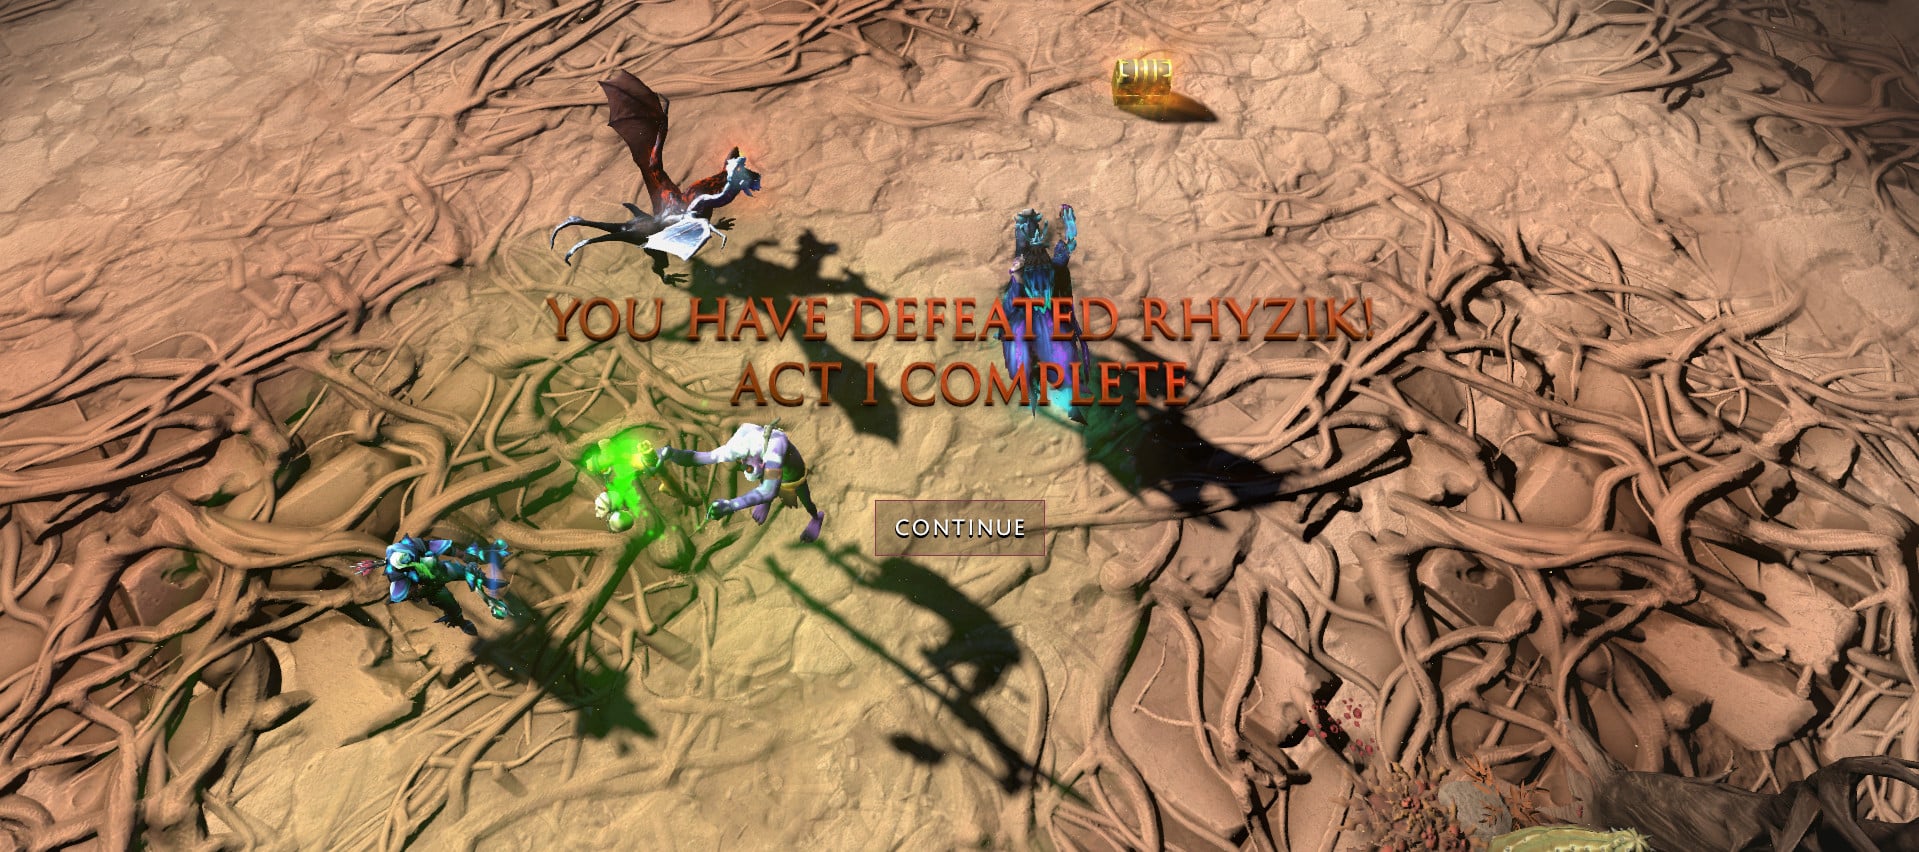
The first campaign is not that hard as it seems! Let’s just clarify it. Look at the picture above. I know that you would like to achieve the same. Hopefully, this guide will help you defeat Siltbreaker’s Final Boss, Rhyzik. Just sit back and relax as we walk you through the Siltbreaker Act 1.
Siltbreaker Act 1, Picks, Tips, Briefing
It’s always good to start explaining which pick is actually the best and easiest to win Siltbreaker. There might be other combinations too, but we decided to go with this one. It’s always good to know what you’re actually doing before you start playing Siltbreaker’s Act 1. Not to avoid, artifacts might be a really good addition to the game in total and may boost a lot of your attributes and stats, give you an additional proc chance or decrease the cooldown of your spells.
Picks
As you can see on the picture above, the picks are pretty clear:
- Witch Doctor: Healer, Magic Damage, Disable, Utility, Crowd Control
- Jakiro: Magic Damage, Disable, Utility, Crowd Control
- Abaddon: Tank
- Drow Ranger: Pure Damage Dealer, Trash Cleaner
Now, after we have our picks ready, it’s time to jump to Siltbreaker’s Itemization part.
Early Game Ability Pickup (Level 1-6):
| LEVELS | Witch Doctor | Jakiro | Abaddon | Drow Ranger |
| 1 | Voodoo Restoration
|
Liquid Fire
|
Aphotic Shield
|
Precision Aura
|
| 2 | Paralyzing Cask
|
Ice Path
|
Curse of Avernus
|
Quelling Shot
|
| 3 | Voodoo Restoration
|
Ice Path
|
Aphotic Shield
|
Precision Aura
|
| 4 | Maledict
|
Liquid Fire
|
Mist Coil
|
Quelling Shot
|
| 5 | Maledict
|
Dual Breath
|
Aphotic Shield
|
Precision Aura
|
| 6 | Death Ward
|
Macropyre
|
Borrowed Time
|
Marksmanship
|


Picking Up The Right Items – Step by Step
By saying “Step by Step” we mean zone by zone, as you move forward in Siltbreaker’s Act One.

Before we continue with the Step-By-Step itemization guide, I just want to make it clear. Make sure you and your team focus only on building the end game items and avoid building trash items that are going to be sold later. This is probably the most important point in Siltbreaker’s Act 1. Never go for early game items that will be sold later. In that way, you just lose a lot of Net Worth, nothing else.
Howling Field
Howling field is the start and we need to kill Berserker Hellbears, so yeah, no itemization is needed. However, you might want to buy at least one or two clarity potions on Witch Doctor, so he can heal without any kind of problem.
Now, as we proceed to Crossroads Garrison, we just want to make sure to pick up all the treasures, right? Do not leave any treasure or boxes unopened.
Crossroads Garrison
When you and your team get to Crossroads Garrison, pick up all the treasures before you activate the event. Speaking of itemization before you trigger the event and waves start coming, this is how it should look:
- Witch Doctor: Magic Wand
- Jakiro: Magic Wand
- Abaddon: Magic Wand
- Drow Ranger: Power Treads, Magic Wand
Keep in mind not to sell anything you find on the way there, especially if it’s useful for any hero on your team. Before the Boss “Lucius Longclaw” spawns, you need to have the following items:
- Witch Doctor: Arcane Boots, Preparing for Guardian Greeves
- Jakiro: Arcane Boots, Vladmir’s Offering
After you kill Lucius Longclaw, the item progress should be as following:
- Abaddon: Doesn’t Buy Anything, Instead, he keeps his money for the Hidden Invoker in Trial of Gallaron.
- Drow Ranger: Preparing for Maelstrom, Buying the Mithril Hammer.
- Jakiro: Perseverance dropped from Lucius Longclaw, Arcane Boots, Vladmir’s Offering
Also, if you don’t own any artifact granting speed aura, you might want to buy a Wind Lace, in order to move faster in Trial of Gallaron and avoid the Arcane Fire Traps.
Visit the Secret Invoker Shop in Trial of Gallaron
It’s time to visit Invoker’s Secret Shop, located in Trial of Gallaron at the second to the last of the Arcane Traps. All you need to do is just walk between the two Arcane Fire Traps in the middle and you will reveal the passage to the Secret Invoker’s Shop. See image below:
Do you like to gamble? Well, our suggestion is not to overdo it, because you don’t want to waste any gold. You can buy Gallarons Gamble and burn 1k gold per hero, which is totally alright, but nothing more than that. Invoker might give you a straight Refresher Orb, Reaver, Hyperstone or any other high-Quality item, but he may also give you a Clarity or Shared Tango :). So, that being said, make sure you burn only around 4k gold in total. Hopefully, you’ll get a Refresher Orb on Jakiro. That’s a priority for him.
After you complete this zone, it’s time to move towards Bonemeal Ridge. But first, you need to visit the shop in order to improve your gear and buy something new.
Bonemeal Ridge
Before you enter Bonemeal Ridge area and Rescue the Soldier Captain and the Missing Soldiers, make sure you have a bit of gear improvement and have the following items per Hero:
- Witch Doctor: Guardian Greeves
- Jakiro: Getting another Perseverance could be nice, preparing for the Refresher Orb, if not enough gold, make sure you just go forward.
- Abaddon: Doesn’t need anything, keeps the same items.
- Drow Ranger: Power Treads, Maelstrom, Magic Wand
Also, make sure you keep the Magic Wands throughout this zone. Do not sell them as they might be really useful.
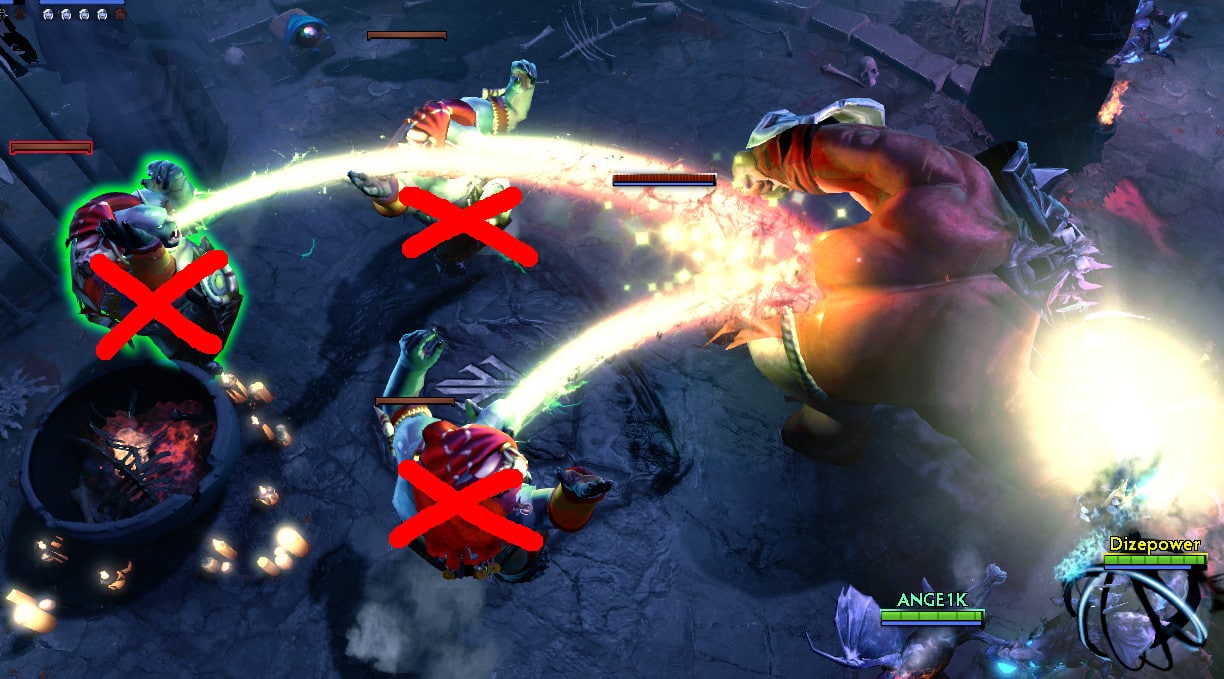
As we progress further in Bonemeal Ridge, I am pretty sure you’ll get some bigger value items, like Ogre Club, Staff of Wizardry or anything else. Giving those to Abaddon or Drow Ranger for buying Aghanim’s is always good. After you Encounter Bogdugg, the boss in Bonemeal Ridge, make sure you first kill the Warlocks behind him. Check Image Below:
After you kill Bogdugg, make sure you improve your items again before you use the two Orbs and go in The Silkmire Pass. After you kill the boss, you might get a Sange or Dagon. Do not sell them, instead, give the Sange to Abaddon and Dagon to Witch Doctor.
The Silkmire Pass
Before you go in the Silkmire Pass, Witch Doc needs his Veil of Discord, and Jakiro Needs his Refresher Orb. However, if Jakiro cannot buy the Refresher Orb fully, you might want to clear The Silkmire Pass and go to the Checkpoint at the end of The Silkmire Pass. You can buy it from there. Make sure you do not initiate the Spider Queen before you get the Refresher Orb on Jakiro.
By that time, Drow Ranger Should also be able to get Aghanim’s Scepter or Mjollnir, dealing with all the adds that spawn. We can preview their items down below:
- Witch Doctor: Guardian Greeves, Veil Of Discord, Couple of Artifacts
- Jakiro: Vladmir’s Offering, Refresher Orb, Arcane Boots, Glimmer Cape, Artifacts
- Abaddon: Power Treads, Aghanim’s Scepter, Sange,
- Drow Ranger: Power Treads, Mjollnir, Getting Close to Aghanim’s Scepter. If he can afford buying Aghanim’s Scepter, make sure you clear the zone until the shop at the end. Then, go back and kill the Queen Spider.
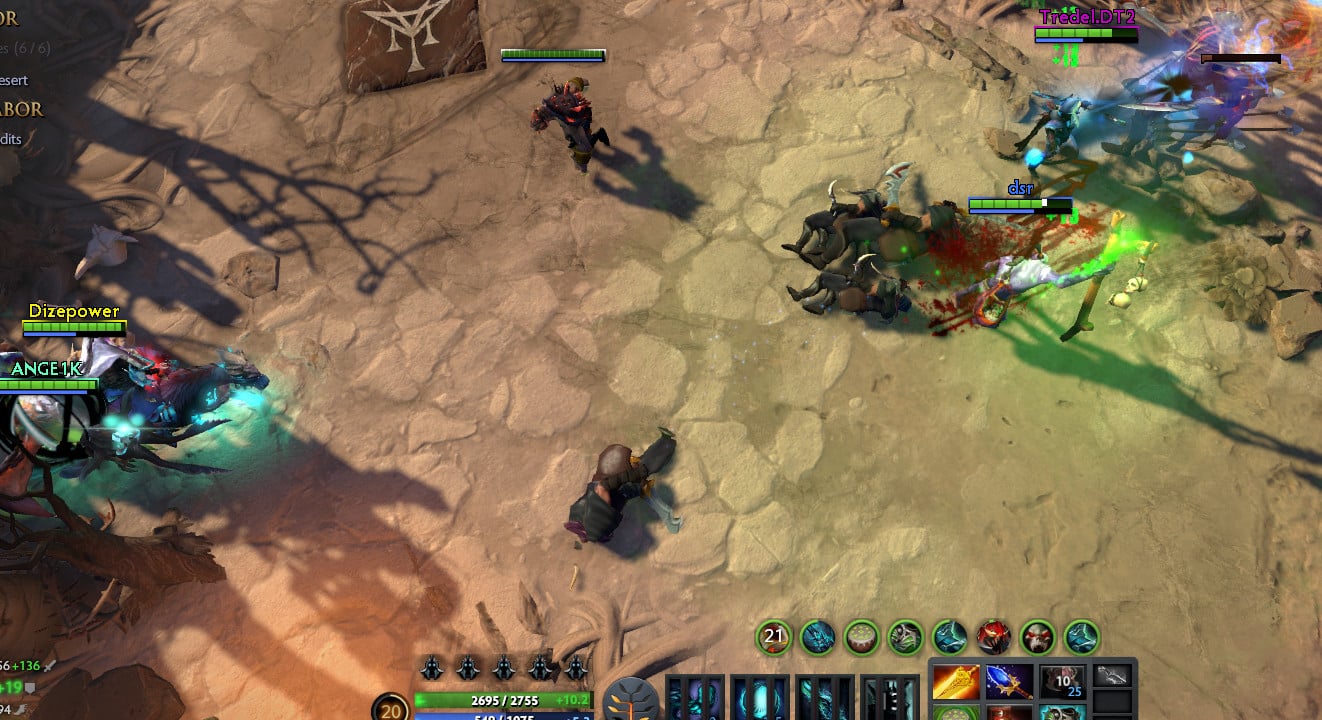
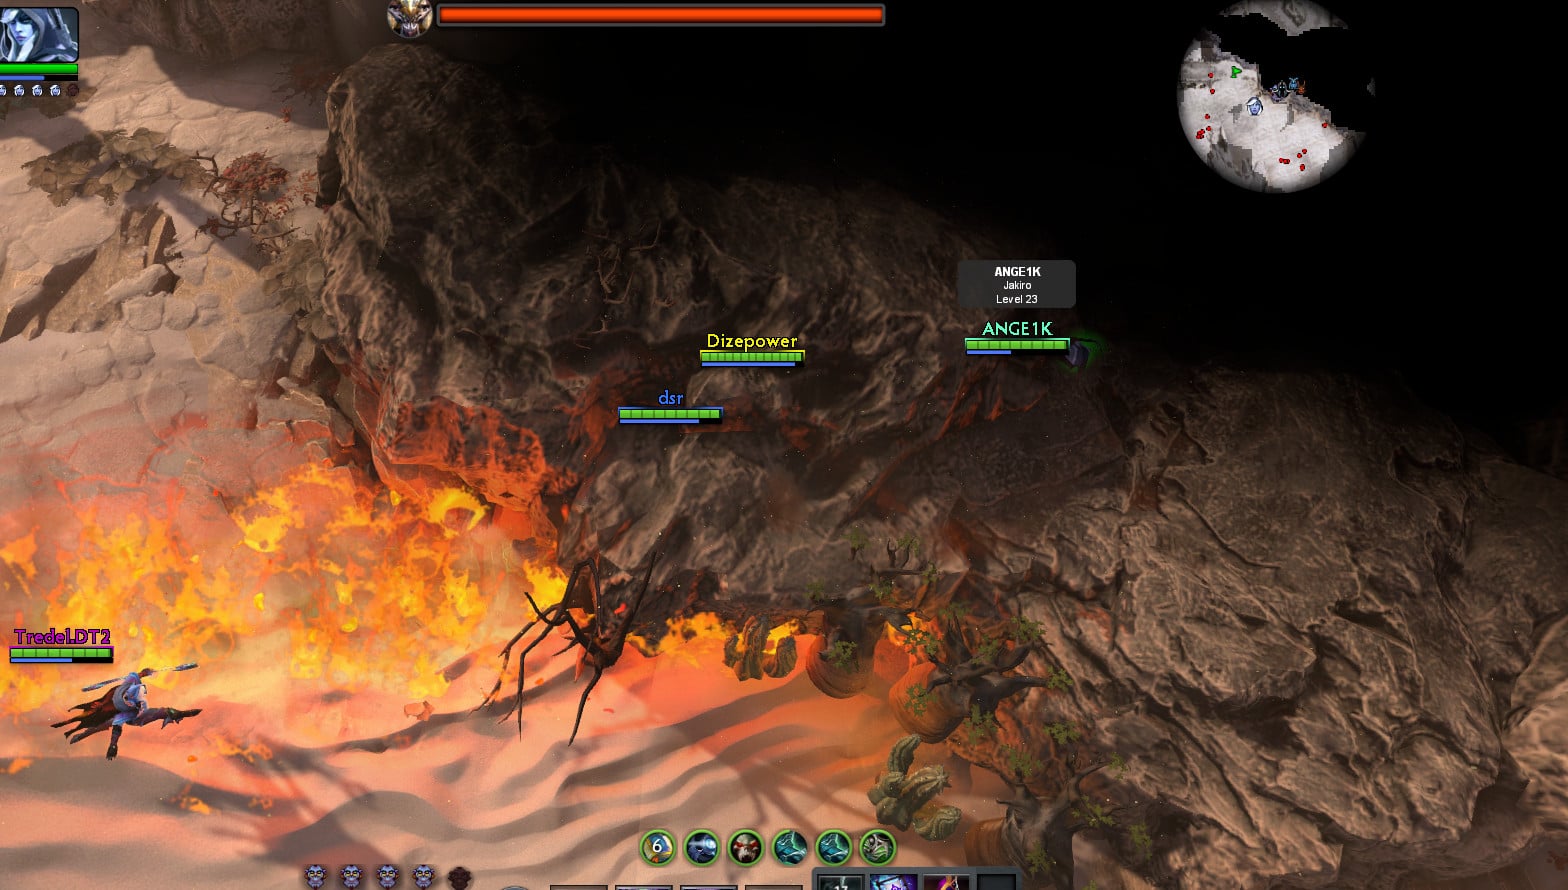
Short Execution Briefing: In the picture below you can see our positioning. We are placed above the stairs while Abaddon tanks the Boss on the stairs. In this way, you won’t get annoyed by the Spider Spread if you’re affected by the spell. As you can see in the image, whoever gets affected he just runs back, preventing the spread from happening (see pointing arrows). However, Drow never gets affected because of his positioning behind Abaddon, so he won’t have any difficulties clearing the trash around. See the picture below, you’ll get the point.

After you kill the Spider Queen, it’s time to advance to the Temple of Ermacor with a little improvements.
Temple of Ermacor
Over here, you need to be careful about the traps because the can instantly kill you. No matter what you do, just make sure you open your eyes and move forward one by one. That will pretty much advance you to the two Omniknights in the Temple of Ermacor, final boss, also known as the Temple Guardian.
Before you encounter the final boss, you will need to get couple more items.
- Witch Doctor: Guardian Greaves, Veil of Discord, Refresher Orb.
- Jakiro: Arcane Boots, Vladmir’s Offering, Glimmer Cape, Refresher Orb.
- Abaddon: Power Treads, Assault Cuirass, Sange & Yasha, Aghanim’s Scepter.
- Drow Ranger: Power Treads, Mjollnir, Monkey King Bar, Aghanim’s Scepter.
Do not forget to keep some of the Artifacts active as you’ll still have some free slots.
The good thing about this boss is that he usually Drops either two Eagle Songs, or he might Drop Sacred Relic. So, Eaglesong can be used by Drow Ranger while Sacred Relic can be used by Abaddon and transform it into Radiance. Cool, right?
Also, make sure you do not forget to buy Tome of Knowledge. It’s really important for all of you so you’ll not fall behind in levels when you encounter the last boss. I remember us waiting for 20 more minutes just to get Tome of Knowledge before the Last Boss. That was really annoying.
The Road to Kalabor
Before you go here, Abaddon must get his Radiance. So the last thing for Abaddon will be the Octarine Core which’ll help him get that Extra Health Regen. Item Progression here:
- Witch Doctor: Same as before.
- Jakiro: Same as before. Just getting a Soul Booster so he can get his own Octarine Core
- Abaddon: In addition to the Items before, only get Radiance.
- Drow Ranger: Same as before.
Now over here, you need to escort Brigwyr to town by defending him from all the threats. It is pretty easy, except the last part before he enters the town. You need to make him a path and do not let any other threat come close to him, which is going to make him turn back and fight. That being said, make sure you got two players on the right and two players on the left side, keeping the spawns blocked. See pic below:
As soon as he opens the door, you’re free to go. You can even let Brigwyr die, but only after the door is opened. Otherwise, it will result in a fail and you’ll need to do the Siltbreaker Act 1 all over again.

Yep, make sure you get the cheese before you continue forward. Everything you do after this is really simple. Drow Ranger needs to just clear all the trash, especially those small bugs that explode. They deal insane amount of damage. This is why Glimmer Cape is important… and that’s to keep Drow safe.
Kalabor Waste
Every single one of you should get close to the end game items. Let’s see the needed items before you defeat Giant Sandswarm Burrowers and Centaur Warlords. This is also where Glimmer Cape is valuable, saving Drow Ranger from any threats. Jakiro will glimmer Drow Ranger in every fight he can, and Drow will be pretty much safe, clearing the trash around Abaddon and others.
Items:
- Witch Doctor: Extremely Close to Octarine Core, other items as before.
- Jakiro: Soul Booster, getting closer to Octarine Core.
- Abaddon: Gets his Octarine Core, as we said, he need it in this before anyone else.
- Drow Ranger: Drow as Drow, he got what he needs already, just move forward and kill enemies.
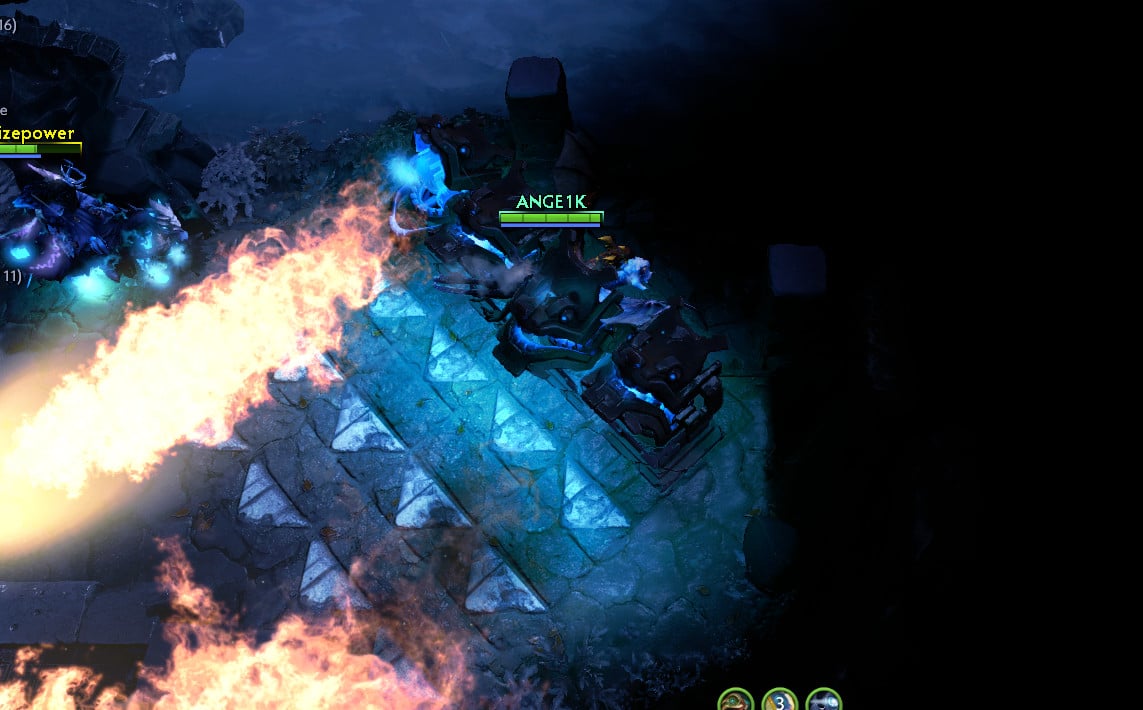
Over here, you can find the second Invoker’s Secret Shop. However, you’ll need a Quelling Blade or Ability to destroy the Cactus. See image Below:
Just make sure you do not gamble that much. As before, you can burn around 1k Gold per player and nothing more. You need the money, so you better keep them. That being said, we’re ready to go to the final push before we meet Rhyzik. Also, do not forget to get the Treasures in this zone, especially the Crabs and get the Extra Gold. That is much of a Value.
Shatterblast Canyon
It’s time for the last push before you go into Rhyzik’s lair. You’ll need to kill 3 Buzzick Captains and some Catapults on the way there. Just make sure you Glimmer Drow Ranger all the time and everything will be alright.
Caution: Let Abaddon do his job by going forward… you do not act cocky and lose any precious and Extra Hero Respawns you have. Every single one of them counts, knowing that the Buyback Actually costs 1 Respawn instead of gold.
Let’s see the items over here:
- Witch Doctor: Guardian Greaves, Dagon 2 – Going to Dagon 5, Veil of Discord, Octarine Core, Heart of Tarrasque.
- Jakiro: Arcane Boots, Octarine Core, Glimmer Cape, Heart of Tarrasque, Refresher Orb, Vladmir’s Offering. Before the last boss, Jakiro is going to sell his Arcane Boots and get a Desolator.
- Abaddon: Radiance, Aghanim’s Scepter, Octarine Core, Heart of Tarrasque, Sange & Yasha, Assault Cuirass. Or, Instead of Heart of Tarrasque, You can Get a Refresher Orb, for which I do not think it will help you that much.
- Drow Ranger: Mjollnir, Monkey King Bar, Butterfly, Daedalus, Satanic, Aghanim’s Scepter.
This is pretty much what kind of late game Items you need. However, we will still post the final items, because changes will be made. This Siltbreaker Guide will help you beat Rhyzik for sure, just make sure you follow the itemization process and build the items accordingly.
Defeating Rhyzik
Do not panic, since you’re here, you already play really good, and Rhyzik is nothing else but a stupid Sand King that thinks he’s strong. Actually, he’s not. He’s really simple to kill, and we’ll post the video too. There’s nothing special you need to do except to avoid his Abilities, Tornados and Earthspikes.
Just make sure before you go into Rhyzik’s Lair, you all have level 25.
Main and Simple Strategy: Witch Doc has a really important role in killing Rhyzik. He needs to break his Linken’s with Casket, then use Veil of Discord, then use Maledict, after that use Ultimate. On the other side, Jakiro’s job is to hit two good Ultimates and keep on breaking his armor with Desolator. Drow Ranger’s job is to clear the trash around and Abaddon’s job is to make Rhyzik Attack him instead of anyone else.
Items to beat Rhyzik:
- Witch Doctor: Guardian Greaves, Dagon Level 5, Refresher Orb, Veil of Discord, Octarine Core, Heart of Tarrasque.
- Jakiro: Desolator, Octarine Core, Glimmer Cape, Vladmir’s Offering, Heart of Tarrasque, Refresher Orb.
- Abaddon: Radiance, Aghanim’s Scepter, Octarine Core, Heart of Tarrasque, Sange and Yasha, Assault Cuirass
- Drow Ranger: Aghanim’s Scepter or Eye of Skadi, Daedalus, Monkey King Bar, Butterfly, Satanic, Mjollnir + Moonshard
UPDATE: After Drow Ranger’s Nerf, you can easily replace his Aghanim’s Scepter with an Eye of Skadi. Whatever makes you feel the best. Also, Do not waste any money on Invoker’s Secret Shop, we manage to be full of items, including Moonshards on everyone. If you’re curious and want to see that, MatchID: 3246445301.
From now, we’re only aiming at improving our achievements, this is where we stand now:
There you go. I honestly hope that this guide will help you Defeat Rhyzik and get the strongest Siltbreaker Act 1 Artifact, which hopefully is going to count for the next Act of this Campaign. Rhyzik is going down and you know it. We honestly tried to finish this Act throughout the whole weekend, working hard on discovering what would be the easiest pick to do it. If you’re curious to see our final fight, you can watch the video below:
Which Artifacts to Use
I kinda think that this guide needs an update about using the right artifacts. The Early stage artifacts are not that important. Instead, we’re just going to let you know which artifacts are the best for confronting Rhyzik, therefore avoid buying 1 or 2 inventory items. We’ve been able to defeat Rhyzik with artifacts only, and yes, some of them are quite OP.
| Artifacts | Carapace of Qaldin
|
The Caustic Finale
|
Unhallowed Icon
|
These 3 artifacts are extremely important for your team. Carapace of Qaldin is good on every single player of the team, especially if you plan on killing Rhyzik while casting Tornados. The Caustic Finale and Unhallowed Icon is good on at least one of your teammates, so you can get that aura. By having these artifacts, you can easily go tank Rhyzik while casting tornados, without getting Satanic. Just make sure you have Vladmir’s Offering and make sure you attack the ground whenever he starts to cast the spell because otherwise, you won’t be able to target him directly. Now you can try out different picks, such as Drow Ranger, Troll Warlord, Shadow Fiend and Templar Assassin. I hope this will also help you a bit.

We finish this with abaddon, troll, sf and Drow pick. I t was awesome too.